vscode
安装
低版本
由于 centos7 glibc 版本较低,最新版的 vscode 无法使用 Remote-SSH 插件,因此推荐安装版本 1.98。连接远程服务器时提示 you are about to connect to an os version that is unsupported by visual studio code(你即将连接到不受 visual studio code 支持的 os 版本),点击 Allow(允许),不影响使用。
禁用自动更新:
点击左下角 齿轮 图标 -> 设置(Settings)
在打开的界面中最上面的搜索框中输入 update 并回车
在 Update:Channel 或者 Update:Mode (配置是否从更新通道接收自动更新)中选择 'manual'
将 Update:Enable Windows Background Updates (配置是否通过Windows更新来更新Vscode)复选框取消勾选
最新版
鉴于上面提到的 centos7 上 glibc 版本较低的原因,这里使用已经编译好的 glibc 2.28,并设置相关环境变量。
cd ~/.vscode-server/
git clone https://github.com/liuliping0315/glibc2.28_for_CentOS7.git
mv glibc2.28_for_CentOS7 glibc228
cd glibc228
tar xf lib.tgz
~/.bashrcexport TOOLCHAIN_DIR=${HOME}/.vscode-server/glibc228 # MODIFY THIS!
export TOOLCHAIN_VERSION=2.28
export VSCODE_SERVER_CUSTOM_GLIBC_LINKER=${TOOLCHAIN_DIR}/lib/ld-${TOOLCHAIN_VERSION}.so
export VSCODE_SERVER_CUSTOM_GLIBC_PATH=${TOOLCHAIN_DIR}/lib
export VSCODE_SERVER_PATCHELF_PATH=${TOOLCHAIN_DIR}/bin/patchelf
下载最新的 vscode 并安装,然后安装 Remote-SSH 插件测试连接远程服务器。
其它解决方案:
https://github.com/MikeWang000000/vscode-server-centos7
https://github.com/hsfzxjy/vscode-remote-glibc-patch
相关讨论 https://www.v2ex.com/t/1126786
连接远程服务器
在 vscode 插件市场中搜索、安装 Remote-SSH 插件
二次验证
在config文件中添加 KbdInteractiveAuthentication yes 以便连集群时进行二次验证。
Host cluster
    HostName login_ip
    User username
    Port login_port
    KbdInteractiveAuthentication yes
jupyter
基本使用
在插件市场中搜索、安装 jupyter
服务器上安装 jupyter
$ mamba install jupyter
使用虚拟环境
新建一个虚拟环境 torch,并将其作为新的 kernel 供 jupyter 使用。可以在其中安装 pytorch 等包作为深度学习的学习环境。
$ mkdir torch
$ python -m venv torch
$ source torch/bin/activate
(torch) $ pip install torch
(torch) $ pip install ipykernel
(torch) $ python -m ipykernel install --name torch --display-name torch --user
jupyterlab
vscode 连接集群登录节点直接使用 jupyter ,其计算任务会在直接登录节点运行,如果资源使用较多、计算任务可能会被杀掉,这里使用 jupyterlab 将 jupyter 提交到计算节点,然后 vscode 连接 jupyterlab 服务,保证计算任务在计算节点进行。
# 也可以使用集群上安装好的 jupyterlab,module load jupyterlab/4.0.3
$ mamba install jupyterlab

# 生成 ~/.jupyter/jupyter_server_config.py 文件
$ jupyter notebook --generate-config

# 生成 token
$ openssl rand -hex 16
ea009747ec6a38dfa5460af7a07d1c00

# 在 jupyter_server_config.py 中设置固定的 token,
# 以免 jupyter lab 生成的链接中的token不一样
$ vim  ~/.jupyter/jupyter_server_config.py
c.IdentityProvider.token = '1d8b0644d0e3d3bec08e3d2e6fcaa98c'
#BSUB -J jupyter
#BSUB -n 1
#BSUB -o %J.out
#BSUB -e %J.err
#BSUB -q interactive

# module load jupyterlab/4.0.3

# 这里根据用户 uid 生成 jupyter 服务端口,避免相互冲突
readonly PORT=$(($(id -u) + 10000))

# 获取节点 IP
readonly HOST=$(hostname -i)

# 这里的 TOKEN 使用上面 openssl 命令生成的一串字符串
# 请不要直接使用这个,每个人不一样
readonly TOKEN='1d8b0644d0e3d3bec08e3d2e6fcaa98c'

cat 1>&2 <<END

jupyter server url

http://${HOST}:${PORT}/lab?token=${TOKEN}

END

jupyter lab --ip=${HOST} --port=${PORT}  --no-browser
$ bsub < jupyter.lsf
46862758
# 出现如下信息表示 jupyter lab 正常启动
$ bpeek 46862758
<< output from stdout >>

<< output from stderr >>

jupyter server url

# 这个链接用于 vscode 连接 jupyter 服务,每个人不一样
http://10.1.12.65:60275/lab?token=1d8b0644d0e3d3bec08e3d2e6fcaa98c
.
.
.
# 出现以下几行说明 jupyter 正常启动了
[I 2025-06-11 15:44:22.819 ServerApp] http://10.1.12.65:60275/lab?token=...
[I 2025-06-11 15:44:22.819 ServerApp]     http://127.0.0.1:60275/lab?token=...
[I 2025-06-11 15:44:22.819 ServerApp] Use Control-C to stop this server and shut down all kernels (twice to skip confirmation).
http://10.1.12.65:60275/lab?token=1d8b0644d0e3d3bec08e3d2e6fcaa98c, 注意这里每个人不一样,也不要给其他人,会有比较高的安全风险。Note
需要使用 Remote-ssh 插件连上集群后,才能使用 vscode 连接上面启动的 jupyterlab 服务。
lsf 作业中 jupyter lab 正常启动后,在 vscode jupyter 中点击右上角的 选择内核 -> 选择其它内核 -> 现有 jupyter 服务器 -> 输入 jupyter服务器 URL,回车。
R 支持
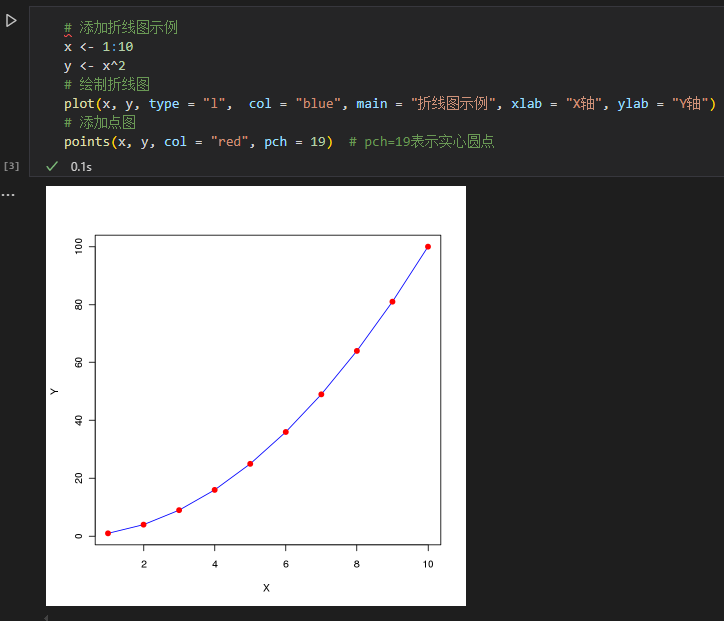
为了在 jupyter 中运行 R代码,需要安装 R 包 IRkernel。
# 可以使用自己安装的R,也可以使用集群中的R,module load R/4.0.0
# 安装 R 包 IRkernel
$ Rscript -e 'install.packages(c("IRkernel"), repos="https://mirrors.ustc.edu.cn/CRAN/")'
# 在当前的 R 中注册 kernel
$ Rscript -e 'IRkernel::installspec()'
# 注册成功后,会生成 ir 的 kernel 目录
$ ls ~/.local/share/jupyter/kernels/
ir
切换内核 -> 选择其它内核 -> Jupyter Kernel -> R
多版本 R 支持
# 上面的例子使用的 R 4.0.0,这里使用 R 3.6.0
$ module load R/3.6.0
# 安装 R 包 IRkernel
$ Rscript -e 'install.packages(c("IRkernel"), repos="https://mirrors.ustc.edu.cn/CRAN/")'
# 在当前的 R 中注册 kernel
$ Rscript -e 'IRkernel::installspec(name = 'ir36', displayname = 'R 3.6')'
# 注册成功后,会生成 ir36 的 kernel 目录
$ ls ~/.local/share/jupyter/kernels/
ir ir36
R 3.6 的 jupyter 内核 切换内核 -> 选择其它内核 -> Jupyter Kernel -> R 3.6
编程语言
R
由于 vscode 版本限制,不能直接在 vscode 中安装 R 语言插件,需要在 vscode-R 代码仓库中下载之前的版本 r-2.8.4.vsix
https://vscode.js.cn/docs/languages/r
https://juejin.cn/post/7499369048561827880
https://cloud.tencent.com/developer/article/2239474
插件推荐
- Chinese (Simplified) 中文界面
- Remote - SSH 远程登录服务器
- Settings Sync 用于在不同设备(如多台电脑)之间同步 VS Code 配置,避免重复设置
- pyhton 提供 Python 语言的支持,包括代码补全、调试、代码格式化等
- Pylance 提供 Python 语言的智能感知功能,包括类型检查、代码补全、代码导航等。
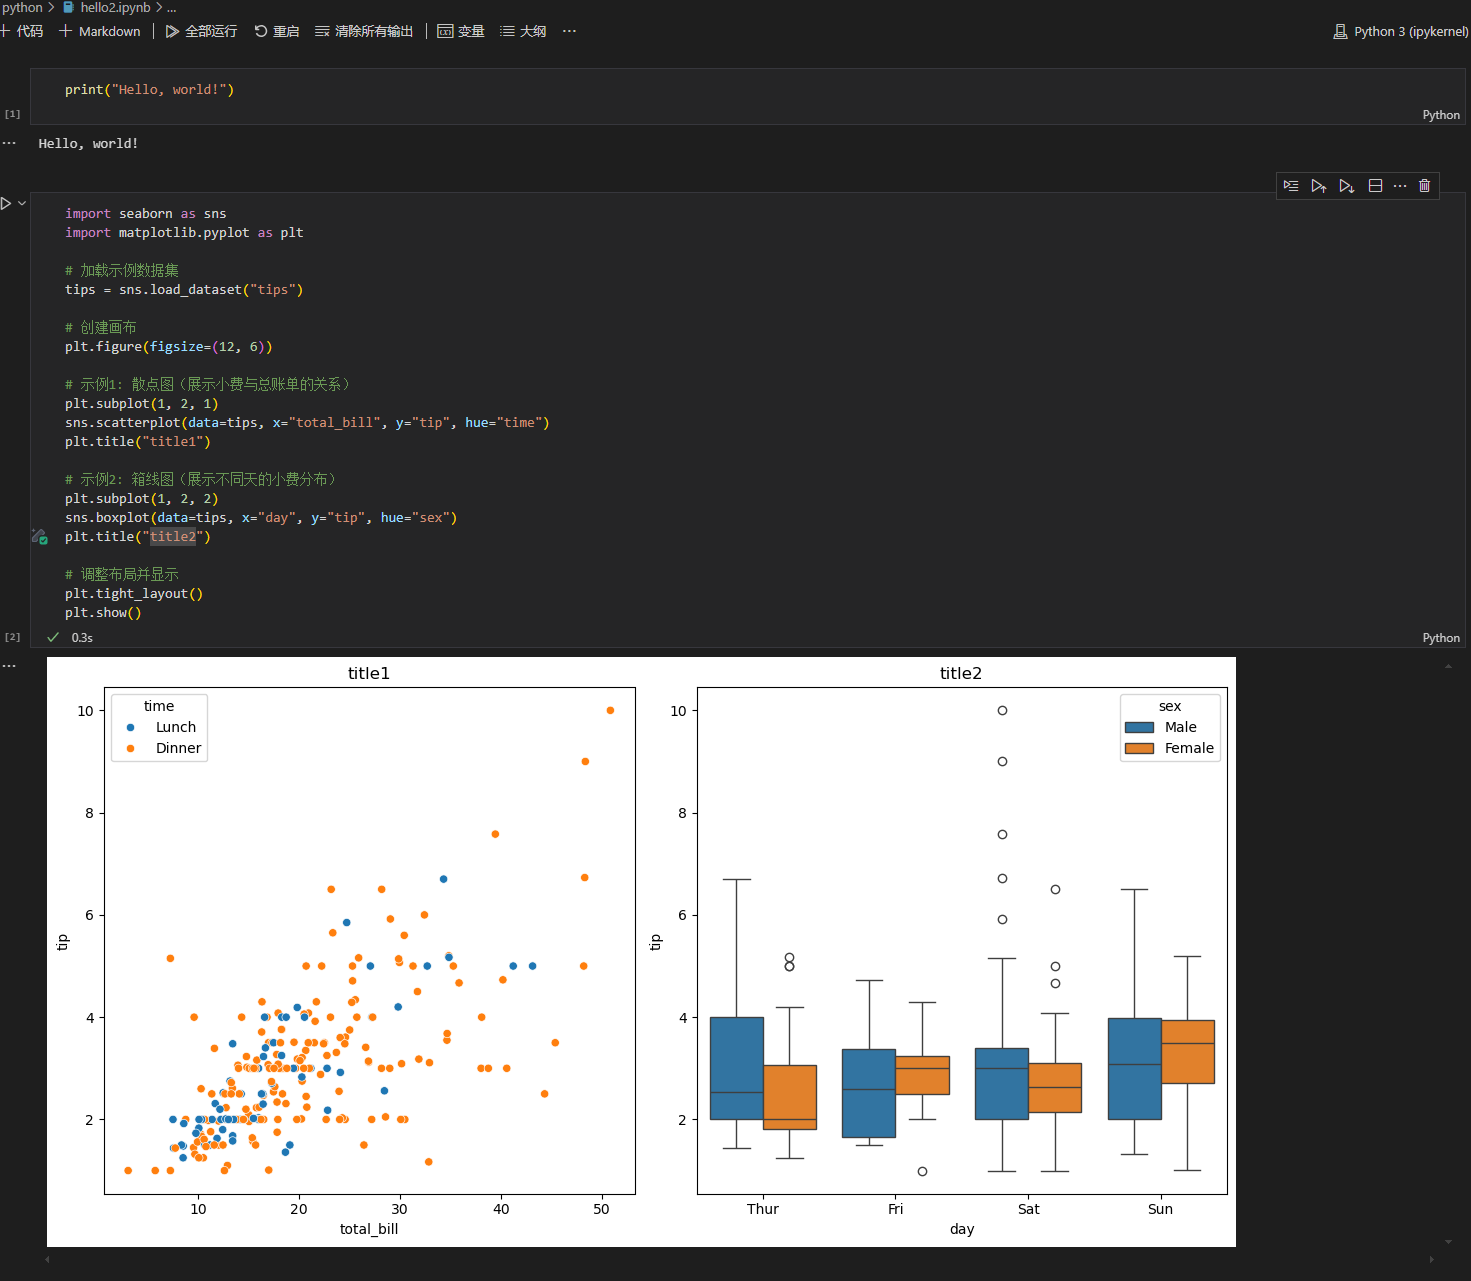
- jupyter 支持 Jupyter Notebook 和 JupyterLab,允许在 VS Code 中运行和编辑 Jupyter Notebook
- R 提供 R 语言的支持,包括代码补全、调试、代码格式化等
- GitHub Copilot 提供 AI 驱动的代码补全和建议,帮助开发者更快地编写代码
- Trae 字节跳动的 AI 代码助手,与 Copilot 作用类似
- Path Autocomplete 在输入文件路径时提供自动补全功能,支持多种文件系统
- Edit csv 提供 CSV 文件的编辑功能,支持 CSV 文件的语法高亮、格式化和基本编辑操作
- Excel Viewer 允许在 VS Code 中查看和编辑 Excel 文件(.xlsx)
- vscode-pdf 允许在 VS Code 中查看 PDF 文件
- HTML Preview 提供 HTML 文件的实时预览功能,支持自动刷新
- polacode-2022 将代码片段转换为图片,支持多种编程语言
- MySQL 提供 MySQL 数据库的支持,包括连接数据库、执行 SQL 查询、查看数据库结构等
- Image Preview 在 VS Code 中预览图片文件
- vscode-json 提供 JSON 文件的支持,包括语法高亮、格式化等
code-server
web 版的 vscode,可在浏览器中使用 vscode
https://github.com/coder/code-server
centos7 由于 glibc 版本过低,需要使用 yarn 编译安装。
Warning
目前安装的 code-server ,安装 jupyter插件后,也无法正常打开渲染 jupyter 文件,有待解决
$ module load nodejs/20.19.2 /GCC/9.4.0
# 安装最新版 code-server 4.100.3
$ yarn  add code-server --prefix /path/to/code-server/
# yarn 安装的 argon2.node 依赖了较高的 glibc,需要删掉从源码编译安装
$ rm /path/code-server/node_modules/argon2/lib/binding/napi-v3/argon2.node
$ cd /path/code-server/
$ npm install argon2 --build-from-source
# 启动
$ /path/to/code-server/node_modules/.bin/code-server
[2025-06-15T09:16:52.642Z] info  code-server 4.100.3 409c64e0df4d53530e59c16acc2b5d5766f717b0
...
[2025-06-15T09:16:52.659Z] info  HTTP server listening on http://0.0.0.0:8000/
...
# 浏览器中打开 http://ip:8000
调用集群上安装好的
$ module load code-server
# 启动
$ code-server
[2025-06-15T09:16:52.642Z] info  code-server 4.100.3 409c64e0df4d53530e59c16acc2b5d5766f717b0
...
[2025-06-15T09:16:52.659Z] info  HTTP server listening on http://0.0.0.0:8000/
...
本站总访问量 次

